Food for Thought
Insta pot Balsamic Mushroom Risotto
Posted by Annette Bellisari on

It’s a slow cooker! It’s a rice cooker! It’s a steamer…no wait, it’s an instant pot. If you haven’t heard, this 7-in-1 kitchen appliance can multitask, functioning as an electric pressure cooker, sauté/browning pan, warmer, and yogurt maker. Yes, yogurt maker.
As much time, money, and space as the thing already saves you, there are always a few instant pot tips and hacks to make the most of the full wonderfulness of this kitchen sorcery.
Instant pot hack 1. Know how to convert your favorite recipes for the instant pot.
You should already know by your basic knowledge of the instant pot that cooking in a pressure cooker is definitely not the same as traditional stovetop or oven.
One example is how milk and high heat don’t do well together. If your recipe does call for some dairy products, add them AFTER your meal is cooked and the appliance depressurized. This will prevent your meal from getting burnt and ruined.
Insta-pot hack 2. Use this cheat sheet for instant pot cooking times.
Foods don’t all cook the same in the pot. To avoid the confusion of keeping track of the individual cook times of every ingredient, use this handy electric pressure cooker time chart. Stick in a sheet protector and tape to the cupboard just above your beloved instant pot for easy reference.
Instant pot tip 3. Use the pot-in-pot method to cook multiple items at once.
You don’t necessarily need to use a pot for this, but any oven-safe glass container or even this stackable stainless-steel steamer basket will do. The idea is to keep foods you don’t want mixing together separated yet still cooked in one go.
Pro tip: Cut down your cooking time, literally. If you’re worried about the different cook times of your food items with the pot-in-pot method, cut the foods that take longer to cook into smaller pieces. You should also place these foods on the bottom, and quicker cooking foods on top for the best use of heat.
Instant pot hack 4. Get acquainted with sauté mode.
The pressure cooker function can already cut your cooking time in half, but it still takes 10-20 minutes for the pressure to build up before your Insta-pot can do its speedy cooking thing.
One workaround is to set to sauté mode and throw in some foods that could use sautéing. Use the time to prepare the rest of your ingredients, toss in, then switch to pressure cooking, since the heat builds up faster this way.*
Insta pot Balsamic Mushroom Risotto
Yields: 5 ½ cups
Ingredients
2 Tbsp. extra-virgin olive oil
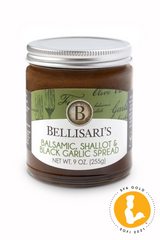
1 jar of Bellisari’s Balsamic Shallot and Black Garlic Spread
1 lb. wild mushrooms, trimmed, sliced
Kosher salt, freshly ground pepper
1 medium onion, chopped
2 cups carnaroli or arborio rice
½ cup white wine
3 ½ cups vegetable or chicken stock
Chopped parsley and finely grated Parmesan (for serving)
Preparation
Set Instant Pot on medium heat or "Sauté" and pour oil into cooker insert. Add mushrooms and cook until any moisture they've released is evaporated and they start to brown, about 10 minutes; season with salt and pepper. Add onion, stir to combine, and cook until translucent, about 8 minutes. Add rice and stir until chalky white, about 3 minutes. Add wine and cook until mostly evaporated, about 3 minutes. Stir in stock. Lock on lid, making sure steam-release valve is in the proper sealed position. Select “Manual” and program for 5 minutes at high pressure (it will take about 10 minutes for the pressure to build before cooking automatically begins).
As soon as the time has elapsed, turn off cooker, “Quick Release” the steam, and unlock lid. Add the 1 jar of Bellisari’s Balsamic Shallot and Black Garlic Spread. Stir with a wooden spoon; season with salt and pepper. Divide risotto among bowls. Top with parsley and Parmesan and serve.
*Adapted from mommyoverwork.com article
Read more
Insta pot Balsamic Mushroom Risotto
Posted by Annette Bellisari on
It’s a slow cooker! It’s a rice cooker! It’s a steamer…no wait, it’s an instant pot. If you haven’t heard, this 7-in-1 kitchen appliance can multitask, functioning as an electric pressure cooker, sauté/browning pan, warmer, and yogurt maker. Yes, yogurt maker.
As much time, money, and space as the thing already saves you, there are always a few instant pot tips and hacks to make the most of the full wonderfulness of this kitchen sorcery.
Instant pot hack 1. Know how to convert your favorite recipes for the instant pot.
You should already know by your basic knowledge of the instant pot that cooking in a pressure cooker is definitely not the same as traditional stovetop or oven.
One example is how milk and high heat don’t do well together. If your recipe does call for some dairy products, add them AFTER your meal is cooked and the appliance depressurized. This will prevent your meal from getting burnt and ruined.
Insta-pot hack 2. Use this cheat sheet for instant pot cooking times.
Foods don’t all cook the same in the pot. To avoid the confusion of keeping track of the individual cook times of every ingredient, use this handy electric pressure cooker time chart. Stick in a sheet protector and tape to the cupboard just above your beloved instant pot for easy reference.
Instant pot tip 3. Use the pot-in-pot method to cook multiple items at once.
You don’t necessarily need to use a pot for this, but any oven-safe glass container or even this stackable stainless-steel steamer basket will do. The idea is to keep foods you don’t want mixing together separated yet still cooked in one go.
Pro tip: Cut down your cooking time, literally. If you’re worried about the different cook times of your food items with the pot-in-pot method, cut the foods that take longer to cook into smaller pieces. You should also place these foods on the bottom, and quicker cooking foods on top for the best use of heat.
Instant pot hack 4. Get acquainted with sauté mode.
The pressure cooker function can already cut your cooking time in half, but it still takes 10-20 minutes for the pressure to build up before your Insta-pot can do its speedy cooking thing.
One workaround is to set to sauté mode and throw in some foods that could use sautéing. Use the time to prepare the rest of your ingredients, toss in, then switch to pressure cooking, since the heat builds up faster this way.*
Insta pot Balsamic Mushroom Risotto
Yields: 5 ½ cups
Ingredients
2 Tbsp. extra-virgin olive oil
1 jar of Bellisari’s Balsamic Shallot and Black Garlic Spread
1 lb. wild mushrooms, trimmed, sliced
Kosher salt, freshly ground pepper
1 medium onion, chopped
2 cups carnaroli or arborio rice
½ cup white wine
3 ½ cups vegetable or chicken stock
Chopped parsley and finely grated Parmesan (for serving)
Preparation
Set Instant Pot on medium heat or "Sauté" and pour oil into cooker insert. Add mushrooms and cook until any moisture they've released is evaporated and they start to brown, about 10 minutes; season with salt and pepper. Add onion, stir to combine, and cook until translucent, about 8 minutes. Add rice and stir until chalky white, about 3 minutes. Add wine and cook until mostly evaporated, about 3 minutes. Stir in stock. Lock on lid, making sure steam-release valve is in the proper sealed position. Select “Manual” and program for 5 minutes at high pressure (it will take about 10 minutes for the pressure to build before cooking automatically begins).
As soon as the time has elapsed, turn off cooker, “Quick Release” the steam, and unlock lid. Add the 1 jar of Bellisari’s Balsamic Shallot and Black Garlic Spread. Stir with a wooden spoon; season with salt and pepper. Divide risotto among bowls. Top with parsley and Parmesan and serve.
*Adapted from mommyoverwork.com article
Read more
Totchos
Posted by Annette Bellisari on

Why did I wait so long to try Totchos? I remember my friend Kate calling and telling me she made her own version of Totchos with our Bellisari’s Blue Cheese, Honey and Shallot Spread and what a hit it was in her house. It inspired me to try a few different recipes with our spreads and sauces and what better day to serve them than Super Bowl Sunday. The love child of tots and nachos “totchos” are the perfect way to hack a bag of frozen tater tots and please your football party guests and since tater tots are a staple in this house- why not try and sneak some vegetables in on them?! Shhhh.
Suggestions:
Basic Totchos- layer tater tots on baking sheet and cook for 20 minutes per directions on bag. Remove from oven and layer with diced avocados, fresh sliced jalapeños, fresh pico and fresh lime juice (see photo). Serve immediately.
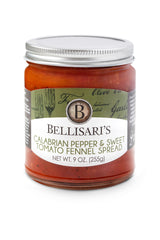
Pizza Totchos- layer tater tots on baking sheet and cook for 20 minutes per directions on bag. Remove and spread 1 cup of Bellisari’s Calabrian and Sweet Tomato Fennel Spread, ½ cup of pepperoni, ½ cup of cooked sausage, black olives and 2 cups of mozzarella cheese. Place back in the oven for 6-8 minutes at same temperature. Serve immediately.
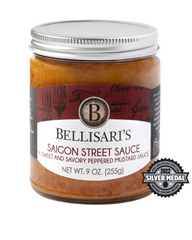
Saigon Pulled Pork Totchos- layer tater tots on baking sheet and cook for 20 minutes per directions on bag. Layer with 2 cups of Bellisari’s Saigon pulled pork and 1 cup of Saigon slaw. Serve immediately.
Blue Cheese, Honey & Shallot Totchos- layer tater tots on baking sheet and cook for 20 minutes per directions on bag. Layer with 2 cups of diced cooked chicken, 2 Tbsp. Bellisari’s Blue Cheese Honey & Shallot Spread and 2 Tbsp. Sriracha sauce and place back in the oven for 6-8 minutes. Remove and garnish with diced green onions. Serve immediately.
Recipe:
Brussels Sprouts & Totchos
Yield: Serves 4
Ingredients
2 cups brussels sprouts, sliced
1 tablespoon olive oil
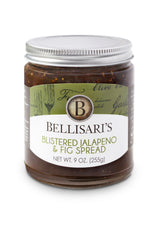
2 tablespoons of Bellisari’s Blistered Jalapeno & Fig Spread
1 package frozen tater tots
1 cup of goat cheese
2 cups of diced cooked bacon
salt and pepper to taste
Directions
Preheat oven to 425 degrees. Spray a baking sheet with non-stick cooking spray. Place sliced brussels sprouts, bacon and Bellisari’s Blistered Jalapeno & Fig Spread in a bowl and toss before spreading them on a baking sheet. Sprinkle salt and pepper on top. Roast for 15 minutes or until golden brown. Remove from oven to cool. Spray another baking sheet with non-stick cooking spray. Place tater tots on baking sheet. Bake for about 20 minutes or until golden brown. Remove from oven and immediately sprinkle goat cheese on top. Then place brussels sprouts and bacon mixture on top. Serve immediately!
Read more
Totchos
Posted by Annette Bellisari on
Why did I wait so long to try Totchos? I remember my friend Kate calling and telling me she made her own version of Totchos with our Bellisari’s Blue Cheese, Honey and Shallot Spread and what a hit it was in her house. It inspired me to try a few different recipes with our spreads and sauces and what better day to serve them than Super Bowl Sunday. The love child of tots and nachos “totchos” are the perfect way to hack a bag of frozen tater tots and please your football party guests and since tater tots are a staple in this house- why not try and sneak some vegetables in on them?! Shhhh.
Suggestions:
Basic Totchos- layer tater tots on baking sheet and cook for 20 minutes per directions on bag. Remove from oven and layer with diced avocados, fresh sliced jalapeños, fresh pico and fresh lime juice (see photo). Serve immediately.
Pizza Totchos- layer tater tots on baking sheet and cook for 20 minutes per directions on bag. Remove and spread 1 cup of Bellisari’s Calabrian and Sweet Tomato Fennel Spread, ½ cup of pepperoni, ½ cup of cooked sausage, black olives and 2 cups of mozzarella cheese. Place back in the oven for 6-8 minutes at same temperature. Serve immediately.
Saigon Pulled Pork Totchos- layer tater tots on baking sheet and cook for 20 minutes per directions on bag. Layer with 2 cups of Bellisari’s Saigon pulled pork and 1 cup of Saigon slaw. Serve immediately.
Blue Cheese, Honey & Shallot Totchos- layer tater tots on baking sheet and cook for 20 minutes per directions on bag. Layer with 2 cups of diced cooked chicken, 2 Tbsp. Bellisari’s Blue Cheese Honey & Shallot Spread and 2 Tbsp. Sriracha sauce and place back in the oven for 6-8 minutes. Remove and garnish with diced green onions. Serve immediately.
Recipe:
Brussels Sprouts & Totchos
Yield: Serves 4
Ingredients
2 cups brussels sprouts, sliced
1 tablespoon olive oil
2 tablespoons of Bellisari’s Blistered Jalapeno & Fig Spread
1 package frozen tater tots
1 cup of goat cheese
2 cups of diced cooked bacon
salt and pepper to taste
Directions
Preheat oven to 425 degrees. Spray a baking sheet with non-stick cooking spray. Place sliced brussels sprouts, bacon and Bellisari’s Blistered Jalapeno & Fig Spread in a bowl and toss before spreading them on a baking sheet. Sprinkle salt and pepper on top. Roast for 15 minutes or until golden brown. Remove from oven to cool. Spray another baking sheet with non-stick cooking spray. Place tater tots on baking sheet. Bake for about 20 minutes or until golden brown. Remove from oven and immediately sprinkle goat cheese on top. Then place brussels sprouts and bacon mixture on top. Serve immediately!
Read more
Skillet Burgers
Posted by Annette Bellisari on

I have said it before and will say it again…. the cast iron skillet is the most underutilized kitchen item out there-especially when cooking a burger. In the winter, when I am craving a good burger, I use a preheated cast-iron skillet. This, my friends, is the absolute key to the perfect burger. Cast iron is the best method for cooking a burger, a steak, shoot... anything you want to sear the bejesus out of.
While I'm busy preparing the meat, I pop my iron skillet into a 350-degree oven. I let it warm thoroughly for about 30 minutes, then, when I'm ready to cook, I move it over a medium-high burner. I must warn you: Be very careful when handling a hot iron skillet. Use oven mitts or the like to pick up your pan, and make sure not to touch the handle without using them. I like to turn the handle away from me on the stove to resist the urge to touch it.
Finally, add a tablespoon, no more, of olive oil to the pan. If your pan is too hot — take it off the burner for a couple of minutes, then try again. If it beads slightly and shines as it hits the pan, it's ready.
Ingredients
1 1/2 pounds ground chuck (80 percent lean) or ground turkey (90 percent lean)
Kosher salt and freshly ground black pepper
1 1/2 tablespoons canola oil
4 slices cheese (optional)
4 hamburger buns, split; toasted
Directions
Divide the meat into 4 equal portions (about 6 ounces each). Form each portion loosely into a 3/4-inch-thick burger and make a deep depression in the center with your thumb. Season both sides of each burger with salt and pepper.
Remember to flip once; don't mess with it. There's a tendency among home cooks to poke and prod their burgers. Do not do that. Instead, put in a maximum of two patties at a time into your cast iron skillet (that's for a 12-inch skillet; smaller sizes should do only one). You'll hear an intense sizzle as the meat hits the searing-hot iron. You might even get some smoke. This is good. Now, do not touch it! Resist the urge to move it, check the underside, whatever. What's happening is the screeching-hot pan is creating a ridiculously rich crust. This crust will both seal in flavor and create flavor. It is the ultimate key to a great burger — a thick crust that you cannot achieve on the grill. After about four minutes, or whenever you can see the side of the patty starting to turn from red to brown, carefully flip your patty and repeat on the other side.
Add the cheese, if using, to the tops of the burgers during the last minute of cooking and tent the burgers with aluminum foil to melt the cheese.
Below are some fun burger recipes with Bellisari’s Gourmet Convenience Spreads & Sauces…
Calabrian and Sweet Tomato Fennel Spread+feta+sliced olives
Blue Cheese, Honey & Shallot Spread+sriracha+fried onions
Saigon Street Sauce+pickled red onions+aged cheddar
Blistered Jalapeno & Fig+gorgonzola+arugula
Balsamic Shallot & Black Garlic+brie+fresh spinach
Read more
Skillet Burgers
Posted by Annette Bellisari on
I have said it before and will say it again…. the cast iron skillet is the most underutilized kitchen item out there-especially when cooking a burger. In the winter, when I am craving a good burger, I use a preheated cast-iron skillet. This, my friends, is the absolute key to the perfect burger. Cast iron is the best method for cooking a burger, a steak, shoot... anything you want to sear the bejesus out of.
While I'm busy preparing the meat, I pop my iron skillet into a 350-degree oven. I let it warm thoroughly for about 30 minutes, then, when I'm ready to cook, I move it over a medium-high burner. I must warn you: Be very careful when handling a hot iron skillet. Use oven mitts or the like to pick up your pan, and make sure not to touch the handle without using them. I like to turn the handle away from me on the stove to resist the urge to touch it.
Finally, add a tablespoon, no more, of olive oil to the pan. If your pan is too hot — take it off the burner for a couple of minutes, then try again. If it beads slightly and shines as it hits the pan, it's ready.
Ingredients
1 1/2 pounds ground chuck (80 percent lean) or ground turkey (90 percent lean)
Kosher salt and freshly ground black pepper
1 1/2 tablespoons canola oil
4 slices cheese (optional)
4 hamburger buns, split; toasted
Directions
Divide the meat into 4 equal portions (about 6 ounces each). Form each portion loosely into a 3/4-inch-thick burger and make a deep depression in the center with your thumb. Season both sides of each burger with salt and pepper.
Remember to flip once; don't mess with it. There's a tendency among home cooks to poke and prod their burgers. Do not do that. Instead, put in a maximum of two patties at a time into your cast iron skillet (that's for a 12-inch skillet; smaller sizes should do only one). You'll hear an intense sizzle as the meat hits the searing-hot iron. You might even get some smoke. This is good. Now, do not touch it! Resist the urge to move it, check the underside, whatever. What's happening is the screeching-hot pan is creating a ridiculously rich crust. This crust will both seal in flavor and create flavor. It is the ultimate key to a great burger — a thick crust that you cannot achieve on the grill. After about four minutes, or whenever you can see the side of the patty starting to turn from red to brown, carefully flip your patty and repeat on the other side.
Add the cheese, if using, to the tops of the burgers during the last minute of cooking and tent the burgers with aluminum foil to melt the cheese.
Below are some fun burger recipes with Bellisari’s Gourmet Convenience Spreads & Sauces…
Calabrian and Sweet Tomato Fennel Spread+feta+sliced olives
Blue Cheese, Honey & Shallot Spread+sriracha+fried onions
Saigon Street Sauce+pickled red onions+aged cheddar
Blistered Jalapeno & Fig+gorgonzola+arugula
Balsamic Shallot & Black Garlic+brie+fresh spinach
Read more
Eating Healthier After the Holidays
Posted by Annette Bellisari on

As the holidays come to an end, we are now all faced with the task of “getting back on track” when it comes to eating healthier. Let's face it: the holidays are a time to unwind, relax, let go of some of your routines and just be present in the moment. Does that mean you throw all care to the wind and don't pay attention to what you eat/drink? No. But I do think it's an opportunity for you to give yourself a break. I don't know about you, but I'm one for routines. I have a morning routine, a nighttime routine and a workout routine. One area I find I lack with routine is incorporating veggies into my boys’ meals on a regular basis.
There are many times I choose to pick my battles and the “veggie fight” is one of them. As I ease back into the reality of 2019, I promised myself(again) that I would involve my boys in meal prep and menu decisions that could help encourage healthier eating. One fun idea I have come up with is creating a stir fry bar at home. On Sundays when you are doing meal prep for the week this is a perfect fit. Here is how we do it at our house…
Choose your own vegetables: bok choy, celery, carrots, spinach, green beans, bean sprouts, water chestnuts, mushrooms.
Choose your own protein: from chicken, turkey, tofu, flank steak, scallops, or shrimp.
Choose your favorite sauce: Bellisari’s Blistered Jalapeno & Fig, Balsamic Shallot & Black Garlic Spread, Calabrian and Sweet Tomato Fennel Spread, Saigon Sauce.
Choose your own starch: Noodles, brown or white rice.
Remember to invest in a set of small bowls, a rice cooker, a wok of your choice (electric, skillet, etc.) and a wok spatula. All these items help in making the perfect stir fry much easier.
Read more
Eating Healthier After the Holidays
Posted by Annette Bellisari on
As the holidays come to an end, we are now all faced with the task of “getting back on track” when it comes to eating healthier. Let's face it: the holidays are a time to unwind, relax, let go of some of your routines and just be present in the moment. Does that mean you throw all care to the wind and don't pay attention to what you eat/drink? No. But I do think it's an opportunity for you to give yourself a break. I don't know about you, but I'm one for routines. I have a morning routine, a nighttime routine and a workout routine. One area I find I lack with routine is incorporating veggies into my boys’ meals on a regular basis.
There are many times I choose to pick my battles and the “veggie fight” is one of them. As I ease back into the reality of 2019, I promised myself(again) that I would involve my boys in meal prep and menu decisions that could help encourage healthier eating. One fun idea I have come up with is creating a stir fry bar at home. On Sundays when you are doing meal prep for the week this is a perfect fit. Here is how we do it at our house…
Choose your own vegetables: bok choy, celery, carrots, spinach, green beans, bean sprouts, water chestnuts, mushrooms.
Choose your own protein: from chicken, turkey, tofu, flank steak, scallops, or shrimp.
Choose your favorite sauce: Bellisari’s Blistered Jalapeno & Fig, Balsamic Shallot & Black Garlic Spread, Calabrian and Sweet Tomato Fennel Spread, Saigon Sauce.
Choose your own starch: Noodles, brown or white rice.
Remember to invest in a set of small bowls, a rice cooker, a wok of your choice (electric, skillet, etc.) and a wok spatula. All these items help in making the perfect stir fry much easier.
Read more
New Years Resolutions
Posted by Annette Bellisari on

New Years brings about many resolutions, but have you established resolutions for your family in the kitchen? I don’t think there is anyone pickier than my two kids when it comes to trying new foods. The battle is exhausting but I know I am not alone. One of my goals for our family for 2019 is for us to try a food from a different culture/part of the world each month. Now a days, our neighborhood is filled with specialty ethnic food markets from Japanese to Mexican, Ethiopian to Vietnamese and more. Many supermarkets have ethnic aisles as well if you don’t have specialty markets close by. Try making it fun and have them research the country/culture on-line and make handmade decorations for the table. You will be making memories and teaching the kids something new.
A second resolution we are planning on working on is asking the kids to help make a grocery list.
If your kids are picky like mine, this resolution is for you. By helping with the grocery list, kids become active participants in choosing ingredients and helping plan meals for the week. It’s not just a great way to get kids involved, it’s also a great way to stick to the list and to your grocery budget.
Last, but my most favorite kitchen resolution is to bake bread together. I am single handedly the worst baker in the family. I can create products and recipes all day long but for some reason when it comes to baking-I am the worst. I am hoping to change that this year. Sure, you can always pick up bread or rolls at the grocery store, but why not start the new year by baking bread at home? Whether you make bread by scratch, or use prepared dough as a base, baking together will create memories to last throughout the year. This goes hand in hand with trying recipes from different cultures…I can’t wait! Here is to a happy and healthy 2019 with much happiness and new adventures!
Read more
New Years Resolutions
Posted by Annette Bellisari on
New Years brings about many resolutions, but have you established resolutions for your family in the kitchen? I don’t think there is anyone pickier than my two kids when it comes to trying new foods. The battle is exhausting but I know I am not alone. One of my goals for our family for 2019 is for us to try a food from a different culture/part of the world each month. Now a days, our neighborhood is filled with specialty ethnic food markets from Japanese to Mexican, Ethiopian to Vietnamese and more. Many supermarkets have ethnic aisles as well if you don’t have specialty markets close by. Try making it fun and have them research the country/culture on-line and make handmade decorations for the table. You will be making memories and teaching the kids something new.
A second resolution we are planning on working on is asking the kids to help make a grocery list.
If your kids are picky like mine, this resolution is for you. By helping with the grocery list, kids become active participants in choosing ingredients and helping plan meals for the week. It’s not just a great way to get kids involved, it’s also a great way to stick to the list and to your grocery budget.
Last, but my most favorite kitchen resolution is to bake bread together. I am single handedly the worst baker in the family. I can create products and recipes all day long but for some reason when it comes to baking-I am the worst. I am hoping to change that this year. Sure, you can always pick up bread or rolls at the grocery store, but why not start the new year by baking bread at home? Whether you make bread by scratch, or use prepared dough as a base, baking together will create memories to last throughout the year. This goes hand in hand with trying recipes from different cultures…I can’t wait! Here is to a happy and healthy 2019 with much happiness and new adventures!