Our Blistered Jalapeno & Fig Whipped Cream & Lemon Tart is the perfect balance of a bit spicy and plenty sweet to make a fantastic dessert.
Whipped Cream
Ingredients:
1 cup cold heavy cream (1/2 pint)
3 Tbsp. sugar
½ tsp. pure vanilla extract
1 Tbsp.
Directions:
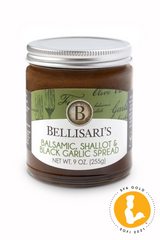
Whip the cream in the bowl of an electric mixer fitted with the whisk attachment. Make sure the bowl is room temperature. When it starts to thicken, add the sugar, vanilla, and the fig spread. Continue to whip until it forms stiff peaks. Serve cold.
Lemon Torte
Ingredients:
1 partially baked 9-inch Great Unshrinkable Tart Shell, or your favorite sweet tart shell (recipe below)
1 average-sized lemon* (about 4 ½ oz.), rinsed and dried
1 ½ cups sugar
1 stick unsalted butter, cut into chunks
4 large eggs
2 Tbsp. cornstarch
¼ tsp. table salt
Directions:
Center a rack in the oven and preheat the oven 350°F (175°C). Place the tart shell on a baking sheet, which you can line with foil or parchment paper to make any spills a breeze to clean up.
Cut the lemon in half and take a look at the thickness of the white ring of the skin. Does it look thick to you, perhaps 1/4-inch thick or larger? If so, go ahead and remove the skin from one half of the lemon before proceeding. If it looks normal or not especially thick, you’ll be just fine. In both cases, slice the lemon halves into thin wheels, remove any seeds, and toss the rounds — lemon flesh and peel — sugar and chunks of butter into the container of a food processor. Process, scraping down the sides of the container as needed, until the lemon is thoroughly pureed. Add the eggs, cornstarch and salt and pulse until the batter is smooth.
Pour into prepared tart shell. It will fill it completely, but if due to slight variances in tart pans, egg sizes, lemon sizes or crust thickness, you have too much, do not pour it past the top of your crust or it will become difficult to unmold later.
Bake for 35 to 40 minutes or until the filling is set. You can test this by bumping the pan a little; it should only jiggle slightly. In my oven, I find that the point at which the filling is set is also when it starts to get very light brown on top.
Let cool on a rack, unmold from the tart pan and serve. I actually prefer this tart completely chilled, which makes it a great dessert to make in advance of a dinner or party.
* Meyer lemons might seem the obvious choice here, and they will work, but I actually prefer this with the sharp, less floral, intensity of standard grocery store lemons.
The Great Unshrinkable Sweet Tart Shell
Adapted from: smitten kitchen
My favorite part about this shell recipe and technique is that it doesn’t require pie weights. How cool is that?!
Makes enough for one 9-inch tart crust.
Ingredients:
1 ½ cups all-purpose flour
½ cup confectioner’s sugar
¼ tsp. salt
1 stick plus 1 Tbsp. (9 Tbsp, 4 ½ oz.) very cold (or frozen) unsalted butter, cut into small pieces
1 large egg*
Directions:
Pulse the flour, sugar and salt together in the bowl of a food processor. Scatter the pieces of butter over the dry ingredients and pulse until the butter is coarsely cut in. (You’re looking for some pieces the size of oatmeal flakes and some the size of peas.) Stir the yolk, just to break it up, and add it a little at a time, pulsing after each addition. When the egg is in, process in long pulses, about 10 seconds each, until the dough, which will look granular soon after the egg is added, forms clumps and curds. Just before you reach this stage, the sound of the machine working the dough will change. Turn the dough out onto a work surface and, very lightly and sparingly, knead the dough just to incorporate any dry ingredients that might have escaped mixing. Chill the dough, wrapped in plastic, for about 2 hours before rolling.
To roll the dough, butter a 9-inch fluted tart pan with a removable bottom. Roll out chilled dough on a floured sheet of parchment paper to 12-inch round, lifting and turning dough occasionally to free from paper. (Alternately, you can roll this out between two pieces of plastic, though flour the dough a bit anyway.) Using paper as aid, turn dough into the 9-inch tart pan with removable bottom; peel off paper. Seal any cracks in dough. Trim overhang to ½ inch. Fold overhang in, making double-thick sides. Pierce crust all over with fork.
Alternately, you can press the dough in as soon as it is processed. Press it evenly across the bottom and up the sides of the tart shell. You want to press hard enough that the pieces cling to one another, but not so hard that it loses its crumbly texture.
Freeze the crust for at least 30 minutes, preferably longer, before baking.
To fully or partially bake the crust, center a rack in the oven and preheat the oven to 375° F. Butter the shiny side of a piece of aluminum foil (or use nonstick foil) and fit the foil, buttered side down, tightly against the crust. And here is the very best part: since you froze the crust, you can bake it without weights. Put the tart pan on a baking sheet and bake the crust for 20 to 25 minutes.
Carefully remove the foil. If the crust has puffed, press it down gently with the back of a spoon. Bake the crust about 10 minutes longer to fully bake it, or until it is firm and golden brown, brown being the important word: a pale crust doesn’t have a lot of flavor. (To partially bake it, only an additional 5 minutes is needed.)
Transfer the pan to a rack and cool the crust to room temperature, and proceed with the rest of your recipe.
The dough can be wrapped and kept in the refrigerator for up to 5 days or frozen for up to 2 months. While the fully baked crust can be packed airtight and frozen for up to 2 months, the flavor will be fresher bake it directly from the freezer, already rolled out.