Crispy, buttery, melty, cheesy – the grilled cheese sandwich really is the quintessential comfort food – not only delicious but also simple to prepare with ingredients that we almost always have on hand. What could be better?! For those of us who cook, this is truly an easy thing to prepare, but for those culinarily- impaired folks out there, achieving a good result isn’t always the outcome. That’s because while relatively simple, there is an art to making a perfect grilled cheese.
Let’s start by defining the perfect grilled cheese. There are virtually endless variations on this classic, but all should meet certain standards. An excellent grilled cheese strikes the perfect balance between crunchy on the outside and gooey on the inside. The outside of the sandwich is golden, crispy, and in my opinion, buttery! The cheese must be melted so that when you pull apart the two halves, you get that iconic melted cheese stretch.
At its most basic, a grilled cheese has three ingredients: fat, bread, and cheese. However, within those simple elements, the options abound.
The fat you choose partly determines the outside texture and taste of the sandwich. I prefer salted butter for a basic grilled cheese, but because it can burn at a relatively low temperature, using this fat requires more attention and patience during cooking. Others like to use an oil of some sort. This more forgiving fat takes a higher temp to burn, and you still get the desired crispness. For some flavor profiles, oil can be the best choice. Finally, some chefs claim that mayonnaise is the perfect medium for the grilled cheese on the basis that it doesn’t burn as quickly as butter, it doesn’t stick to the pan, and it browns and crisps more evenly. It also tastes like hot mayonnaise – tangy and, in my opinion, not half as nice as butter.
The bread you use is a major factor in the success of your grilled cheese. While I’m sure I’ve used bagels and hamburger buns to make a melted cheese sandwich in the past, for the purposes of the perfect grilled cheese, I am going to insist on sliced bread. In other words, there can be crust around the edges but not covering the whole outside of the sandwich. Other than that, anything goes -- from the whitest store-bought sandwich loaf to rye to rustic homemade whole grain; most any sliced bread is great for a fabulous grilled cheese.
Since cheese is in the name of the dish, you might guess that it’s the most important element of the grilled cheese, and you’d be right! However, if you think you must only use certain kinds of cheese, you’d be wrong. One of the beauties of this simple comfort food is that virtually any cheese that melts can be used. From the most basic American cheese slice to the fanciest imported French brie, if you like the flavor and it melts, you can use it for a grilled cheese sandwich. I find that grated cheese melts more quickly and evenly than sliced cheese. Bags of pre-grated cheese are convenient and are usually fine, but if we’re making the perfect grilled cheese, block cheese that you grate freshly melts more evenly and cohesively. In my opinion, if you have the time, grating it at home is optimal.
Now that we have all the ingredients ready, it is time to cook the grilled cheese sandwich. The basic steps are: butter your bread, place a slice into the heated pan, sprinkle on the cheese, top with the remaining slice of bread and cook until golden brown on both sides making sure that the cheese has fully melted.
The key to getting that golden-brown bread and melted cheese is the heat. The higher the heat the quicker your bread is going to brown and the lower the heat the longer it will take. This means that cooking at a lower temperature will allow you to cook for longer; thus, giving the heat time to penetrate the sandwich and melt the cheese. I find that pre-heating my pan to medium heat and then lowering the temperature to one notch below medium works best for your basic grilled cheese sandwich.
The requisite tools are instruments that every kitchen has:
Frying pan – My number 1 “go-to” for this type of cooking is the iron skillet, but any skillet could work. Non-stick is preferable. A griddle, panini maker, or an electric skillet could all produce excellent results.
Spatula – A food turner with a wide, flat blade works best.
Knife – This for buttering the bread and cutting the sandwich.
Step 1:
Preheat your cooking surface over medium heat.
Step 2:
Butter one side of a slice of bread. Softened or melted butter is best. Place bread slice, buttered side down, into the heated skillet and lower heat to medium-low.
Step 3:
Place cheese on top of bread. (You choose your preferred bread to cheese ratio.)
Step 4:
Butter one side of another slice of bread. Place bread on top of cheese, butter side up.
Step 5:
Turn sandwich over once golden brown on the bottom. Be patient. You want to achieve that golden outside AND have a melty inside.
Low (heat) and slow timing (be patient) is one of the keys to ensuring your cheese melts at approximately the same rate that the bread toasts. Keep the heat in the medium to medium-low range and adjust it as you cook. (Pressing down with the wide spatula or putting weight on the sandwich as each side cooks can help produce an evenly browned and evenly melted grilled cheese. I’ve been known place a smaller iron skillet on top of the sandwich to give it a panini-like finish.)
Step 6:
Once golden brown on both sides and melted in the middle, cut in half on the diagonal (this is not optional! 😉) and serve hot.
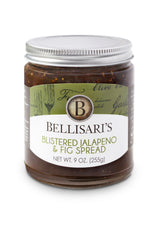
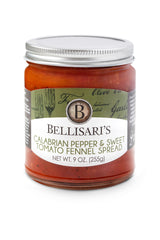
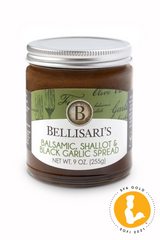
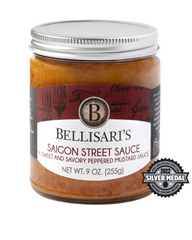
Easy peasy grilled cheesy...The basic grilled cheese on its own is wonderful, but it is also the perfect canvas on which to show your creativity. Obvious add-ons like tomato slices, avocado, or sliced apples are great, but for really taking a grilled cheese to the next level, check out these recipes using Bellisari’s Spreads: https://bit.ly/2tpn5kZ and https://bit.ly/2BFPozX.


