Food for Thought

The Panini Press

Posted by Annette Bellisari on

THE PANINI PRESS


The panini press doesn’t have to be just for sandwiches. Today many people use the kitchen press for a variety of other recipes. Here are a few from our Bellisari’s test kitchen for you to try out.

Press Omelette

Serves 1

Ingredients:
2 eggs
1 oz. of fresh spinach
2 slices of pancetta
1 Tbsp. of Bellisari’s Blue Cheese Honey & Shallot Spread

Directions:
Lay pancetta on the press and close the lid. Cook the bacon until crispy and brown, about 2 minutes. Remove the bacon to a plate. Do not drain the fat. Whisk the eggs and Bellisari’s Blue Cheese, Honey & Shallot Spread, and then scatter the spinach on the press, pour the egg mixture over the spinach, close the lid, and cook for 1 minute. Using tongs, remove the cooked egg and spinach from the press and fold gently. Dice the pancetta to top your omelette and serve.

Fig & Mascarpone Croissant French Toast

Serves 6-8

Ingredients:
8 large croissants
4 cups heavy cream
4 large eggs
1 tsp. freshly grated nutmeg
1 tsp. cinnamon
8 oz. mascarpone, softened
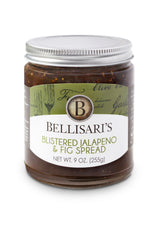
1 jar Bellisari’s Blistered Jalapeno & Fig Spread

Directions:
For the batter, whisk the heavy cream, eggs, nutmeg, and cinnamon together in a large bowl. Set aside. Slice the croissants in half horizontally. Spread the mascarpone cheese on the middle. Close the croissants and set aside. Preheat the press. When the press is hot, dunk two croissants in the batter, lay on press, close and cook for approximately 4 minutes. Top with warmed Bellisari’s Blistered Fig and Jalapeno Spread and enjoy.

Grilled Veggies

Serves 4

Ingredients:
1 zucchini, sliced thinly
2 portobello mushrooms, cleaned and sliced on a diagonal
2 roasted bell peppers (from a jar is fine)
8 oz. of fresh mozzarella, thinly sliced 
Extra virgin olive oil to coat panini press
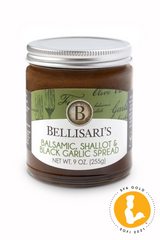
1 jar Bellisari’s Balsamic Shallot & Black Garlic Spread 
Salt and pepper to taste

Directions:
Preheat the press. Drizzle the eggplant, mushrooms and zucchini with some olive oil and season with salt and pepper. Closing the lid, grill the veggies for a few minutes on each side until they develop some grill marks and have softened. Remove to plate and using a brush, coat the veggies with Bellisari’s Balsamic Shallot & black Garlic Spread.

Flat Iron Steak

Serves 4

Ingredients:
1 ½ lb. flat iron steak
Coarse salt and black pepper
8 fingerling potatoes
Olive oil
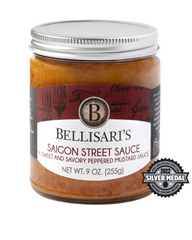
1 jar Bellisari’s Saigon Street Sauce

Directions:
Place fingerling potatoes in a large pot and cover with enough water to cover potatoes. Add salt and boil for 10 minutes. Drain and set aside. Heat the panini press to high and pat the steak dry with paper towels. Salt and pepper both sides generously. Place the steak on the grill and close lid and cook for 9-11 minutes for medium rare. Remove the steak and let rest for 10 minutes. While steak is resting, cut potatoes in half, toss in olive oil and place them cut side down on panini maker. Close lid and cook for 4 minutes. Warm Bellisari’s Saigon Street Sauce and drizzle on both steak and potatoes. Enjoy!

Read more


A Twist On A Traditional Irish Breakfast

Posted by Annette Bellisari on

A TWIST ON A TRADITIONAL IRISH BREAKFAST


This week we have taken traditional Irish breakfast recipes and put our own Bellisari’s twist on each one. There are so many fun traditional Irish food recipes that you can try at home for St. Patrick’s Day. Everything from corned beef and cabbage to Irish soda bread, beef potpies, boxty pancakes, colcannon or even haggis. Boxty is a traditional Irish potato pancake that is part pancake and part hash brown. You can serve it for breakfast or with smoked salmon and crème fraiche. Colcannon is a dish of mashed potatoes with kale or cabbage. There are many colcannon recipes that use garlic and leeks as well. For those of you that have not tried or even heard of haggis, it may be worth a shot. Haggis is a savory pudding containing sheep’s liver and minced with onion, oatmeal, suet, spices and salt. It is traditionally encased in the animal’s stomach but today it is often in an artificial casing instead. Although it may not sound appealing, haggis has an excellent nutty texture and savory flavor. This week we have taken traditional Irish breakfast recipes and put our own Bellisari’s twist on each one. Try creating an Irish Brunch for family or friends this St. Patrick’s Day season!

Ingredients:
1 large onion, cut into 3/4-inch pieces
1 large garlic clove, minced
½ stick (¼ cup) unsalted butter
1 red bell pepper, chopped coarse
1 tablespoon all-purpose flour
¾ cup beef broth
1 Tbsp. Worcestershire sauce
½ lb. cooked corned beef (from a 3 to 4 lb. corned beef brisket), cut into ¾ inch cubes (about 2 cups)
2 sweet potatoes (about 1 lb.), cooked, peeled and cut into ½ inch dice
Salt and pepper, to taste
1 egg

Directions:
In a large non-stick skillet cook onion and garlic in butter over moderate heat, stirring, until onion is golden. Add bell pepper and cook stirring, 5 minutes. Sprinkle flour over mixture and cook stirring, 2 minutes. Stir in broth and Worcestershire sauce and simmer, stirring, 2 minutes. Add corned beef, potatoes, and salt and pepper to taste and cook over moderate heat, turning hash, until browned and crisp, about 15 minutes. Serve hash with poached eggs.


Irish Brown Bread

Ingredients:
Unsalted butter, room temperature, for pans
2 ¼ cups all-purpose flour, plus more for pans
½ cup unsulfured molasses
¾ cup hard dry cider (such as Angry Orchard Stone Dry)
3 packages (¼ oz. each) active dry yeast (21 grams)
2 ¼ cups coarse whole meal flour (King Arthur)
4 tsp. kosher salt

Directions:
Butter two 8-1/2-inch by 4-1/2-inch loaf pans. Dust with all-purpose flour, tapping out excess.

In a small saucepan, combine molasses, 1 cup water, and cider. Heat over medium, just until mixture reaches warm room temperature. Sprinkle yeast over top and let stand until yeast is bubbly, about 5 minutes.

Combine flours and salt in the bowl of an electric mixer fitted with a paddle attachment. Beat to combine. Add the yeast mixture and beat on medium until well combined, 2 to 3 minutes. Cover with plastic and place in a warm spot until doubled in size, about 1 ½ hours.

Divide dough between prepared pans. Drape with plastic wrap and let stand until doubled in size, about 1 hour more. Meanwhile, preheat oven to 350° F with a baking sheet on lower rack. Transfer loaves to oven, being careful not to deflate. Bake 30 minutes.

Remove bread from pans and place on preheated baking sheet. Continue baking until hollow-sounding when tapped on bottom and an instant-read thermometer reads 190 to 200 degrees, about 30 minutes more. Transfer to wire racks to cool completely. Loaves will keep in an airtight container at room temperature for up to 3 days.

Serve with Bellisari’s Blistered Jalapeno & Fig Spread and an Irish butter or Bellisari’s Blue Cheese Honey & Shallot Spread.

Read more

A Twist On A Traditional Irish Breakfast

Posted by Annette Bellisari on

A TWIST ON A TRADITIONAL IRISH BREAKFAST


This week we have taken traditional Irish breakfast recipes and put our own Bellisari’s twist on each one. There are so many fun traditional Irish food recipes that you can try at home for St. Patrick’s Day. Everything from corned beef and cabbage to Irish soda bread, beef potpies, boxty pancakes, colcannon or even haggis. Boxty is a traditional Irish potato pancake that is part pancake and part hash brown. You can serve it for breakfast or with smoked salmon and crème fraiche. Colcannon is a dish of mashed potatoes with kale or cabbage. There are many colcannon recipes that use garlic and leeks as well. For those of you that have not tried or even heard of haggis, it may be worth a shot. Haggis is a savory pudding containing sheep’s liver and minced with onion, oatmeal, suet, spices and salt. It is traditionally encased in the animal’s stomach but today it is often in an artificial casing instead. Although it may not sound appealing, haggis has an excellent nutty texture and savory flavor. This week we have taken traditional Irish breakfast recipes and put our own Bellisari’s twist on each one. Try creating an Irish Brunch for family or friends this St. Patrick’s Day season!

Ingredients:
1 large onion, cut into 3/4-inch pieces
1 large garlic clove, minced
½ stick (¼ cup) unsalted butter
1 red bell pepper, chopped coarse
1 tablespoon all-purpose flour
¾ cup beef broth
1 Tbsp. Worcestershire sauce
½ lb. cooked corned beef (from a 3 to 4 lb. corned beef brisket), cut into ¾ inch cubes (about 2 cups)
2 sweet potatoes (about 1 lb.), cooked, peeled and cut into ½ inch dice
Salt and pepper, to taste
1 egg

Directions:
In a large non-stick skillet cook onion and garlic in butter over moderate heat, stirring, until onion is golden. Add bell pepper and cook stirring, 5 minutes. Sprinkle flour over mixture and cook stirring, 2 minutes. Stir in broth and Worcestershire sauce and simmer, stirring, 2 minutes. Add corned beef, potatoes, and salt and pepper to taste and cook over moderate heat, turning hash, until browned and crisp, about 15 minutes. Serve hash with poached eggs.


Irish Brown Bread

Ingredients:
Unsalted butter, room temperature, for pans
2 ¼ cups all-purpose flour, plus more for pans
½ cup unsulfured molasses
¾ cup hard dry cider (such as Angry Orchard Stone Dry)
3 packages (¼ oz. each) active dry yeast (21 grams)
2 ¼ cups coarse whole meal flour (King Arthur)
4 tsp. kosher salt

Directions:
Butter two 8-1/2-inch by 4-1/2-inch loaf pans. Dust with all-purpose flour, tapping out excess.

In a small saucepan, combine molasses, 1 cup water, and cider. Heat over medium, just until mixture reaches warm room temperature. Sprinkle yeast over top and let stand until yeast is bubbly, about 5 minutes.

Combine flours and salt in the bowl of an electric mixer fitted with a paddle attachment. Beat to combine. Add the yeast mixture and beat on medium until well combined, 2 to 3 minutes. Cover with plastic and place in a warm spot until doubled in size, about 1 ½ hours.

Divide dough between prepared pans. Drape with plastic wrap and let stand until doubled in size, about 1 hour more. Meanwhile, preheat oven to 350° F with a baking sheet on lower rack. Transfer loaves to oven, being careful not to deflate. Bake 30 minutes.

Remove bread from pans and place on preheated baking sheet. Continue baking until hollow-sounding when tapped on bottom and an instant-read thermometer reads 190 to 200 degrees, about 30 minutes more. Transfer to wire racks to cool completely. Loaves will keep in an airtight container at room temperature for up to 3 days.

Serve with Bellisari’s Blistered Jalapeno & Fig Spread and an Irish butter or Bellisari’s Blue Cheese Honey & Shallot Spread.

Read more


Soups

Posted by Annette Bellisari on

SOUPS


With the cold weather back this week I have been craving soup. Soups can be a variety of things in the kitchen. It can be an efficient way to utilize leftovers, it can be an easy meal when you don't feel like cooking, and it can range from a versatile hearty meal with friends and neighbors to a light complement for a ladies’ lunch.

There are several "tools" that will help you and your soup making. First, a good heavy pot is great for making soup. They hold heat, allow you to maintain steady simmers and gentle boils, and will keep soup warm for a nice long time. Next is a blender. A blender is key when making creamy or puree soups. A traditional blender is fine, it just may take you a little longer to "blend" everything as several "batches" for an entire pot. Better is a hand-held immersion type blender. You can use this right in the pot and have great control and consistency. Lastly, make sure you have a ladle. I know many of us might use a tea cup or something else, but get yourself a ladle with a long handle and a large scoop.

Next are the aromatics, things such as onions, leeks, garlic, and often celery and carrots. Cooking them over low to medium heat in the pan before adding any liquid will help soften their texture and blend their flavors. Cook, stirring occasionally, until they are soft but not browning, about 5 minutes. The goal is to break down their cellulose (making them easier to eat or purée later) and get them to give off some of their liquid, which will deepen the flavor of the soup.

Most soups are primarily water-based, but it can be disguised as broth, stock, wine, or milk. The vast majority of the time, the liquid in soup is stock or broth. For the absolute best flavor use homemade stock; many delis and butchers sell freshly made frozen stock that works great, too. If you buy mass-produced broth find a brand sold in boxes instead of cans to avoid a slight tinny taste. When adding wine to soups, be sure to bring it to a boil and let it cook for at least 10 minutes to cook off the harshest of the alcohol.

Salt/season in layers. Salt soup as chefs do: in layers. Try adding salt to the aromatics and other vegetables as you cook them. If you're cooking the meat separately, make sure it is well seasoned before it goes into the pot. Lastly taste it before serving and add salt accordingly.

Lastly, add a final step of fresh herbs or a dollop of cream or yogurt. Maybe even a little citrus juice depending on the type of soup you made. This last step will take your homemade soup "over the top" for your family and guests.

(Source - The Spruce)

Read more


Cooking Japanese Food At Home

Posted by Annette Bellisari on

COOKING JAPANESE FOOD AT HOME


I love teaching cooking classes. It is one of my favorite things to do. A cooking class is like having a big group of family in my kitchen discussing different cuisines, recipes and culinary approaches. I think my two favorite cuisines to teach are Japanese and Italian. Because of my heritage, the Italian cuisine comes quite easy to me, so the challenge of Japanese is always intriguing.

I recently taught a Japanese cooking class where we learned about onigiri and sukiyaki (we’ll post a recipe for that on Thursday.) As a mom of picky eaters I am always looking for ways to get some protein into their busy bodies and the onigiri is a fun way to do so! I have included a recipe and also some fun photos for you to try with your family or friends. There are a variety of unique seaweed flavors and textures that you can choose from at your local Japanese market, so make this a fun event for everyone to participate in. Remember, you can fill the onigri with anything you would like. I have listed some traditional Japanese items as suggestions, but be creative!

Onigiri Rice Balls

Rice ball ingredients:
½ cup cooked Japanese rice
¼ sheet nori seaweed
Pinch of salt
Shiso perilla leaf (optional)
Sesame seeds (optional)

Possible fillings:
Cooked chicken
Cooked salmon
Tuna mayo
Pickled plums
Tsukemono Japanese pickles

Directions: 
Begin by cooking the Japanese rice according to your favorite method. With a small amount of salt sprinkled on your hands, mold the rice into small balls or triangles approximately 3-4 inches wide.

Create a small well in the center of the rice and put in your choice of ingredients. Then mold the rice around the well to cover your filling completely. Using a sheet of nori seaweed, wrap up your ball of rice.

Sprinkle some sesame seeds or cut up shiso leaves to put on the rice for a little extra flavor (optional). Your onigiri is now ready and will be a perfect addition to your bento lunch box or as a snack.

Read more


Hosting A Winter Wine Tasting

Posted by Annette Bellisari on

HOSTING A WINTER WINE TASTING


Winter months are a great time to have friends over for a winter wine tasting and share in some food pairings. No matter what your wine preferences may be, we at Bellisari’s have a product for you. Keeping gourmet convenience in mind, each spread label includes a wine pairing for your ease of entertainment.

Balsamic, Shallot and Black Garlic Spread pairs with Chardonnay

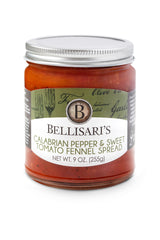
Calabrian Pepper and Sweet Tomato Fennel Spread pairs with Red Zinfandel

Blistered Jalapeno and Fig Spread pairs with Light Chianti Classico

Blue Cheese, Honey and Shallot Spread pairs with Riesling

Wine tastings don’t need to be stuffy, boring or complicated. You can turn any event into a wine tasting: birthday parties, bridal showers, or even a neighborhood progressive party. There are a variety of types of wine tastings you can go with that can make it fun or educational. The main objective is to put your guests at ease and to remind them there is no wrong answer when it comes to tasting wine. Here are a few different format options…

Theme Tastings

For example, throw a Tuscan wine tasting where you can explore the wines and foods of that region.

Blind Tastings

A blind tasting works best when you want to compare different varieties of grape such as Chardonnay, Pinot Grigio, Shiraz, and Pinot Noir. It can add a bit of fun to these wine tasting party ideas because it gets your guests more involved. This can work well as an ice breaker or for parties with a large numbers of guests. The wine labels are hidden and guests try to identify the country, grape, and perhaps the price point from the appearance, aroma, and taste of the wine.

Non-Blind Tastings

Non-blind wine tastings work well for more relaxed, informal tastings where the objective is just to taste and enjoy the wines, or for when combining with a seated dinner or buffet. As with a blind tasting you could explore different grapes varieties, or you could compare the same type of grape from different countries or vintages to see how different they can be. The advantage of a non-blind tasting is that knowing more about the wine, such as the country, flavor profile, and a little history about the winery, can often add to your guest's enjoyment of the wine.

Price Wars

One of my favorite wine tasting party ideas is a variation on a blind tasting. Make half the wines affordable everyday wines and the other half more expensive fine wines. Have everyone taste the wines blind and rank them in order of price from low to high, along with their reasons and which they preferred. You might be surprised to find expensive wines ranking low and vice versa. 

Now that you’ve got some wine tasting party ideas, here are a few step-by-step tips to go with them.

Taste in the Correct Order

The order in which you taste the wines is important. Start with dry and move to sweet for the whites then proceed light through to full-bodied with red, younger to older. If you are holding a blind tasting for larger numbers be sure to number each bottle so guests know which order to taste them.

Look

Start by holding the glass (preferably over a white table cloth) tilted away from you to examine the color. Try to pinpoint the shade of white or red. For example, is the white wine a straw yellow, yellow-green, or gold color? Or is the red wine a ruby red, red-brown, or purple color? Then study the opacity. Is it dark or watery? Clear or cloudy?

Smell

First, swirl the wine in the glass for a good 5-10 seconds. This will release the aromas. Put your nose to the glass and inhale deeply. What does the smell remind you of? Can you identify any fruits, flowers, herbs, spices, or even more unusual flavors such as chocolate or oak?

Taste

Next, take a sip but don't swallow the wine. Instead let it swirl around gently in your mouth. Think about whether it's dry or sweet, light or heavy, thick or thin, and creamy or crisp. Then move onto trying to identify the flavor profile, in the same way you did with smell. Can you detect fruits, spices, or a woody taste?

Swallow

Swallow the wine and think about what sort of after-taste (or 'finish') is has. Do the flavors linger or disappear quickly? Would you describe it as light-bodied (watery), medium (milky), or full bodied (creamy)?

Regardless of which theme you decide to apply to your wines tasting party, here is a basic list of things you'll need.

Choose 4 - 8 different wines to taste

The recommended amount of each wine for a tasting is two ounces per person. So, one bottle of each wine will serve up to 12 people. I think six wines is best (perhaps three white and three red) as that's about enough to keep people's attention—anymore and it can become hard to distinguish them all from one another.

Wines glasses should be clear

Guests need to see the color clearly, especially if it's a blind tasting. Make sure the glasses have a stem (so the wine isn't warmed by cupping the glass in the hand) and a deep enough bowl to be able to swirl the wine around 

Pitchers of water

Unless you have enough glasses to provide everyone with a fresh one for each wine, just provide pitchers of water to rinse glasses after each wine.

Dump buckets

You'll need to provide dump buckets for people to pour any left-over wine away before moving onto the next one. These can also double up as buckets to dump the water into when rinsing glasses in between wines.

Ice Buckets/Decanters/Corkcicle

Decant your red wines a few hours before. For white wines most people chill them in ice buckets, but this often chills them too much and you end up masking the flavors. To keep wines at the optimum temperature, use a Corkcicle. It's a handy little gadget that you insert into an open bottle to cool the wine from the inside out 

Cork Screws

Always have a backup cork screw. Guaranteed it will break when you need it most. 

Palate cleanser

If you're taking the wine tasting seriously, provide plain crackers (nothing flavored) or pieces of bread (nothing grainy/salty) such as baguettes which will help cleanse the palate in between each wine.

Glass identifiers

If it's a light hearted wine tasting party, there are lots of different novelty wine charms you can attach to the wine glasses to help guests identify which glass belongs to whom. 

Tasting menus

For non-blind tastings it’s quite nice to provide a simple tasting menu which introduces each wine with some background information such as the country of origin, the flavor profile, and perhaps some background on the winemaker.

Flavor profiles

For blind tastings, provide some notes explaining the flavor profile for different grapes to help steer guests in the right direction.

Bags

You can use bags for blind tastings to wrap each bottle and hide the label.

Score Cards

For blind and non-blind tastings, make some homemade score cards to rate and make notes on each wine.

Wine tips are from Matt James and party-ideas-by-a-pro.com

Read more