It is that time of year again…the dreaded back-to-school time. There is no getting around it, you'll need some time before it feels normal to get back on that rollercoaster. Over the course of your summer, you might have enjoyed the lazy days of takeout food and breakfast for dinner more often than probably appropriate. This might make it difficult to get back into your routine. To reset your chaotic schedule of grocery shopping for those back-to-school lunches and dinners, don’t wait until the last minute to return to your routine, take a few days to ease back into it. The kids don't want to go back to school any more than you want to face the chaos that ensues every morning trying to get out the door. One way to make your life a little easier is to plan ahead and have your first week of meals mapped out. The ability to have a healthy home-cooked meal while fitting in work, sports and back-to-school meetings always makes the transition of summer to school go a little more smoothly. We've created a week of back-to-school meals to make it a little easier to face the inevitable. Enjoy!
Saigon Glazed Burgers & Sweet Potato Chips
Serves 4
Ingredients:
1½ pounds ground beef
½ tsp. kosher salt (additional for chips)
¼ tsp. pepper
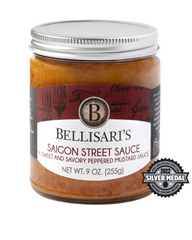
1 jar Bellisari’s Saigon Street Sauce
2 large sweet potatoes
½ tsp. minced garlic
1 Tbsp. olive oil
½ tsp. fresh minced rosemary
Burger Directions:
Heat the grill or pan to medium-high heat. Form beef into four ½" thick patties and season with ½ tsp. of salt and ¼ tsp. of pepper. Grill the burgers to desired temperature 4-5 minutes per side for medium. Baste with Saigon Street Sauce during the last two minutes of cooking. Keep the jar of Bellisari’s Saigon Street Sauce on the table…it is a family favorite!
Chip Directions:
Thinly slice the chips and toss with olive oil, minced garlic, minced rosemary, and a little sea salt for chips. Preheat oven to 400°F and bake for 20-25 minutes or until crispy.
Cinnamon & Sugar Fig Pull Apart Breakfast Bread
Serves 4
Ingredients:
1/2 cup sugar
2 1/2 tsp. cinnamon
1/3 cup butter, melted
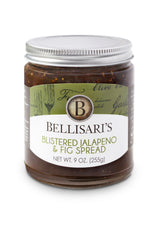
½ cup Bellisari’s Blistered Jalapeno and Fig Spread
2 (6-oz) cans refrigerated buttermilk biscuits
Directions:
Heat oven to 400°F. Generously grease 8x4" loaf pan. In small shallow bowl, combine sugar, and cinnamon; mix well. Separate dough into 10 biscuits; cut each into quarters. Mix the fig and butter together and melt carefully. Dip each quarter into melted butter and fig mixture; roll in sugar-cinnamon mixture. Arrange in greased loaf pan. Bake at 400°F for 19 to 27 minutes. Cool 2 minutes. Loosen edges; remove from pan. Place on serving plate. Serve warm.
Bellisari's Calabrian & Sweet Tomato Orecchiette
Serves 4
Ingredients:
1 pound Orecchiette
1 jar Bellisari's Calabrian & Sweet Tomato Fennel Spread
1/4 tsp. dried crushed red pepper
1 cup thinly sliced fresh basil leaves
1 cup fresh mozzarella (bocconcini balls)
Directions:
Cook pasta in large pot of boiling salted water until tender but still firm to bite. Drain Orecchiette.
Add Bellisari's Calabrian & Sweet Tomato Fennel Spread and crushed red pepper to skillet; sauté until tomatoes soften, about 2 minutes. Add 1/2 cup basil and sauté for 2 minutes. Bring to simmer. Add pasta to sauce and toss to coat. Mix in cheese and remaining 1/2 cup basil; cook until cheese is coated, tossing often, about 2 minutes. Season pasta to taste with salt and pepper.
Creamy Shrimp with Corn, Blue Cheese & Bacon
Serves 4-6
Ingredients:
1 cup of long grain rice
Kosher salt and pepper
4 slices bacon
1 Tbsp. olive oil
1 onion chopped
½ cup Bellisari’s Blue Cheese Honey & Shallot Spread
¾ cup heavy cream
1 ¼ pounds of large shrimp, peeled and deveined
1 10-oz bag frozen corn
Directions:
In a saucepan with a tight fitting lid, combine the rice and 1 ¼ cup water and ½ tsp. of salt and bring to a boil. Stir once, cover and reduce heat to low. Simmer for 18 minutes leaving lid on. Remove from heat and let stand, covered for 5 minutes. Fluff with a fork before serving.
Cook bacon in large skillet over medium-high heat until crisp, 5-7 minutes. Transfer to paper towel and let cool, then break into pieces. Wipe out skillet and heat to medium-high heat. Add the onion and cook until softened, 4-6 minutes. Add the Bellisari’s Blue Cheese, Honey & Shallot Spread and heavy cream and bring to a boil. Stir in the shrimp, corn and ¼ tsp. salt and pepper. Simmer 4-6 minutes, stir in bacon and serve over rice.
Balsamic Shallot & Black Garlic Brie Flatbread
Serves 2-4
Ingredients:
1 ready-made flatbread
1 Tbsp. olive oil
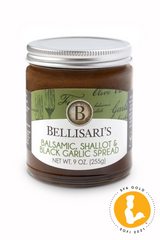
½ jar Bellisari’s Balsamic Shallot and Black Garlic Spread
4 oz. Brie cheese, Sliced
1 small pear, thinly sliced
2 Tbsp. of fresh sage
Directions:
Preheat oven to 400°F. Brush flatbread with olive oil. Spread Bellisari’s Balsamic Shallot & Black Garlic Spread over flatbread, top with thinly sliced brie and pears. Put in the oven for 10 minutes. Remove and top with fresh sage. Cook for 2 more minutes and enjoy!
Pan Seared Balsamic Pork Chops
Serves 4-6
Ingredients:
1 jar Bellisari’s Balsamic Shallot & Black Garlic Spread
1 tsp. seasoned salt, plus more for seasoning
1 tsp. ground black pepper, plus more for seasoning
8 pork chops
1 cup all-purpose flour
1/2 cup canola oil
1 Tbsp. butter
Directions:
Salt and pepper both sides of the pork chops. Combine the flour and some salt and black pepper. Dredge each side of the pork chops in the flour mixture, and then set aside on a plate.
Heat the canola oil over medium to medium-high heat. Add the butter. When the butter is melted and the butter and oil mixture is hot, cook 3 pork chops at a time, 2 to 3 minutes on the first side. Flip and cook until the chops are golden brown on the other side, 1 to 2 minutes. Remove to a plate and repeat with the remaining pork chops. Once finished, drain oil and butter from pain leaving trimmings in pan. Pour in jar of Bellisari’s Balsamic Shallot & Black Garlic Spread and heat. Serve with the butternut squash recipe below.
Blistered Jalapeno & Fig Butternut Squash
Servings 6
Ingredients:
2 medium butternut squash (4 to 5 pounds total)
6-8 Tbsp. unsalted butter, melted and cooled
1 1/2 tsp. kosher salt
1/2-1 tsp. fresh ground black pepper
1 jar Bellisari's Blistered Jalapeno & Fig Spread
Directions:
Preheat the oven to 400°F. Cut off ends of each butternut squash and discard. Peel the squash and cut in half lengthwise. Using a spoon, remove the seeds. Cut the squash into 1 1/4" to 1 1/2" cubes (large and uniform is best), and place them on a baking sheet.
Add the melted butter, Bellisari's Blistered Jalapeno & Fig Spread, salt and pepper to the baking sheet. Toss all of the ingredients together and spread out in a single layer on the baking sheet. Roast for 45 minutes to 55 minutes, until the squash is tender and the glaze begins to caramelize. Turn the squash while roasting a few times with a spatula to be sure it browns evenly.
Adjust seasonings if needed. Serve hot.